| <– Previous Page (6/9): Making a Hub | Next Page (8/9): Installation –> |
To minimize car down-time I purchased a used set of spindles so I could prepair all parts and take my time without having my car sitting useless in the garage.
Rotor Shield Modification
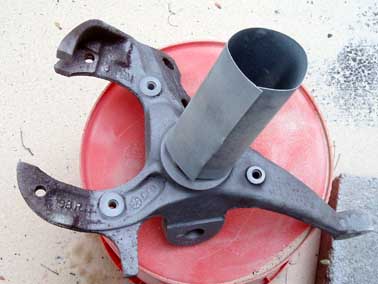
On the majority of swaps I have seen they do not use the rotor shield. I decided to use the part of the shield that in my opinion is the most important, the “ring” that goes around the hub bearing seal (you can see in the pictures below what I am referring to). The ring prevents any grease that escapes from the rear bearing seal of the hub from spraying onto the rotor. This is very important because if grease gets on the rotor not only will it severely hurt your stopping power, it will be absorbed by your brake pads and they will have to be replaced.
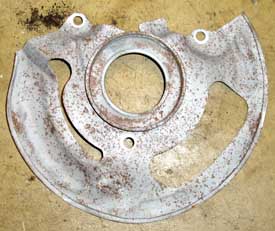
1) Here is what the stock brake shield looks like after it is removed from the spindle and lightly sand blasted.
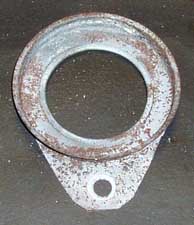
2) I used tin snips to cut the center “ring” out. This ring protects the rotor from grease that leaks out of the rear bearing hub seal.
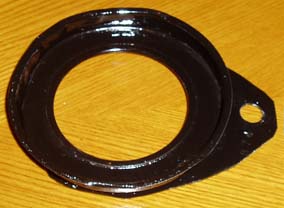
3) Lastly I put a coat of Por-15 rust preventative paint on it.
Spindle Modification
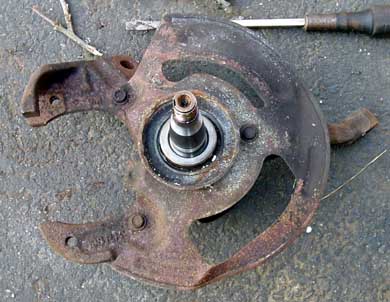
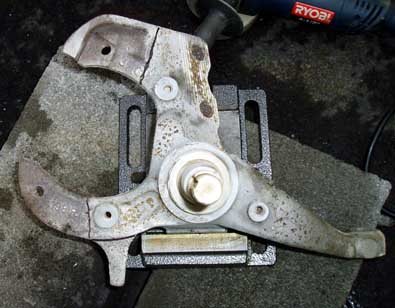
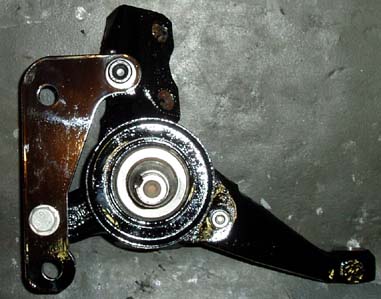
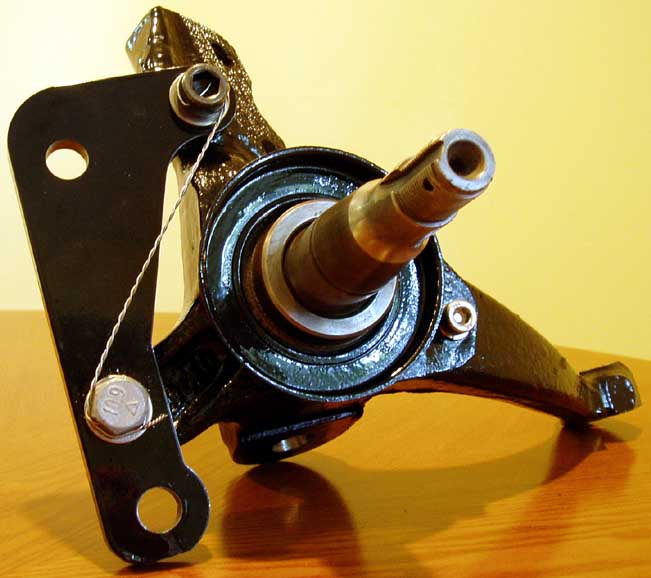
1) Here is what the spindle looked like when I first received them (only one pictured).
2) I did a quick sandblasting on the spindle to clean it up and make it more workable. I wrapped the spindle shaft in a piece of sheet metal to keep the surface smooth. This is important to keep smooth because the bearings ride on the spindle shaft.
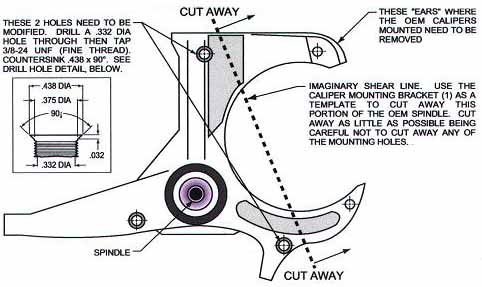
3) Mark off the area where to cut on the spindle like I have done below. On a C4, C4 HD, and LS1 brake upgrade you will need to remove the steering stop because the spindle bracket will go in it’s place. If you are doing a C5 or C6 brake upgrade with the C5/C6 bracket provided on the bracket page of this tutorial then make sure to leave the factory steering stop intact!
I believe the picture below is from Baer Brakes upgrade manual, I am not sure though. Ignore the information about drilling and taping the holes, I will explain this below.
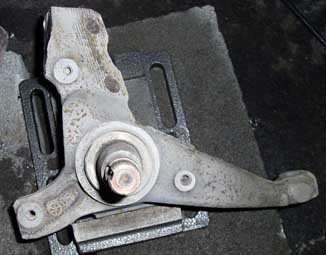
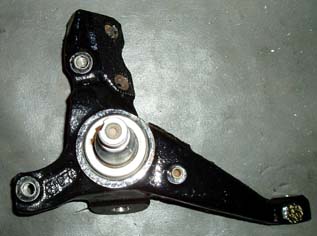
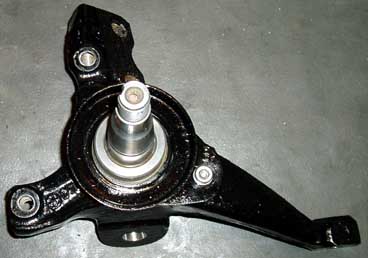
Here is the picture of the spindle after chopping off the spindle ears and the steering stop off the spindle.
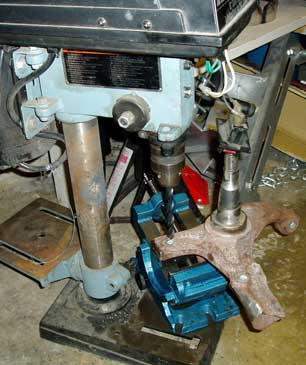
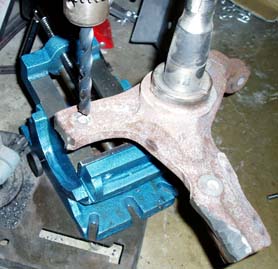
4) Now two of the three holes where the dust shield was mounted must be drilled out and taped for a larger bolt. The stock bolt size in the spindle used to hold the dust shield on is far too small and would be too weak to hold a spindle bracket. The holes need to be drilled with a 13/32 drill bit. Make sure you use a brand new drill bit for this, you want the holes to be a straight and clean cut as possible. I highly recommend using a drill press, an angle (tilting) vice, and a small bubble level to make a perpendicular hole. The hole must be almost exactly perpendicular to the mounting surface, if it is not the bolt will be at an angle against the spindle bracket and could cause a fastener failure. You should also drill both holes all the way through the spindle.
5) Tap the newly drilled holes with a 12mm x 1.75 mm tap. Make sure you use thread cutting oil to insure clean cut threads. Another tip when taping the holes is after every full turn back the tap out one half turn to help clear the metal filings. I also coated the spindle with Por-15 to prevent rust. The reason I chose 12mm x 1.75mm thread size is because the factory GM 88-92 Thridgen 1LE brake setup used 12mm x 1.75mm bolts to mount the 1LE adapter bracket to the spindle.
Assembly
1) Mount the modified rotor shields (really only a hub grease shield now) with the original bolt or you use can use a stainless steel bolt with a lock washer like I did. The size of the bolt is a 8mm x 1.25 pitch x 15mm long.
2) Mount the spindle bracket to the spindle. The top bolt is a 12mm x 1.75 pitch x 45mm long, 12.9 grade socket cap (allen) bolt. The bottom is a GM bolt part # 11508133, this bolt is a 12mm x 1.75 pitch x 30mm long 10.9 grade bolt. I also used two 12mm hardened stainless steel washers. Before you mount these bolts drill through them so they can be safety wired. These bolts should be tightened to 89 ft.lbs without loctite, or 83 ft.lbs with loctite. The lower foot-pounds rating with loctite is due to the fact that loctite acts as a lubricant and can cause fastener over tightening if not taken into account. If you are using safety wire do not use loctite.
Note on upper socket cap (allen) bolt: In retrospect I would have used a 10.9 grade 12mm x 1.75 pitch x 45 mm long bolt because it is less brittle (higher flexural strength) then 12.9 grade blot. This would make it less likely to fail in this application; this is due the the face that these bolts are under much greater bending load then then tensile load.
3) Spindle Done! I safety wired the bolts in place to insure they will never come out and for piece of mind. This step is optional but is highly recommended.
| <– Previous Page (6/9): Making a Hub | Next Page (8/9): Installation –> |
Page created: January 2006
Page content last updated: February 2006
great article, but the spindle holes should be drilled with a 27/64 bit and not a27/32
Thanks for pointing out the typo. I went and looked up the reference table for drill bit sizes and it looks like I was listing the wrong size drill bit either way. 27/64 is used for 12mm x 1.25 thread pitch, a 13/32 drill bit is suppose to be used for a 12mm x 1.75 thread pitch tap. Page updated.
Irwin Machine Screw Tap and Drill Bit Selection Guide: http://www.irwin.com/uploads/documents/14_machine_screw_selection_guide.pdf
Regarding fastener choice, a 10.9 grade bolt is not less “brittle” than a 12.9, neither are so hard as to be brittle. They are both ductile, the 12.9 is slightly higher in tensile and shear strength. I’d use 12.9’s, the stronger the better here. Sorry to nitpick…
Awsome page! A wealth of knowledge! Qick question: you mounted the caliper braket to the modified dust shield mounts, why did you choose this instead of bolting it to the excisting caliper mounts. Oviusly both options require spindle modification
What am I suppose to do about a steering stop since I’ll be cutting the oem off?
Have yet to see anyone have a solution for this problem. I have this issue too.